Bake the perfect small-batch bread recipe for one loaf pan size with simple pantry ingredients. Soft, fluffy, easy homemade bread ideal for small families.
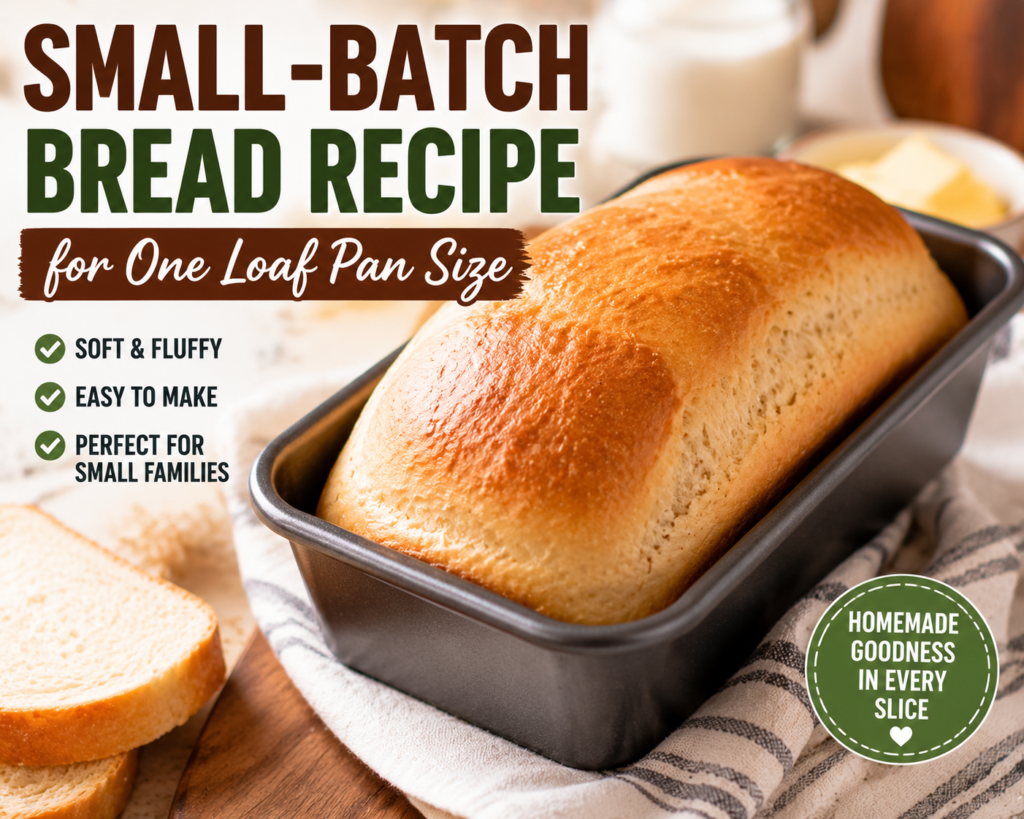
Small-Batch Bread Recipe for One Loaf Pan Size
Nothing compares to the aroma of freshly baked homemade bread filling your kitchen. If you’ve been searching for the perfect small-batch bread recipe for one loaf pan size, this easy recipe is exactly what you need. It makes one soft, fluffy loaf that’s ideal for small households, couples, or anyone who doesn’t need multiple loaves sitting on the counter.
Many people love a small-batch bread recipe for one loaf pan size because it reduces waste, uses basic pantry ingredients, and is simple enough for beginner bakers. Instead of making a large batch, this recipe produces just the right amount of fresh bread for sandwiches, toast, breakfast, or dinner.
What makes this version special is its incredibly soft texture, golden crust, and reliable results. You don’t need a stand mixer or advanced baking skills. With just a few simple ingredients and a standard loaf pan, you’ll enjoy bakery-quality homemade bread that’s perfect for everyday meals. Whether you’re baking for the first time or you’re an experienced home baker, this recipe delivers delicious results every time.
Recipe Overview
| Details | Information |
|---|---|
| Prep Time | 20 minutes |
| Rise Time | 1 hour 30 minutes |
| Bake Time | 30 minutes |
| Total Time | About 2 hours 20 minutes |
| Servings | 10 slices |
| Calories | Approximately 170 per slice |
| Difficulty Level | Easy |
Why You’ll Love This Recipe
- Makes one perfect loaf with no leftovers.
- Soft, fluffy texture and golden crust.
- Beginner-friendly instructions.
- Uses everyday pantry ingredients.
- No stand mixer required.
- Great for sandwiches, toast, and French toast.
- Easy to customize with herbs, seeds, or whole wheat flour.
Ingredients
| Ingredient | Quantity | Purpose | Possible Substitution |
|---|---|---|---|
| All-purpose flour | 3 cups | Main structure | Bread flour |
| Warm water (110°F/43°C) | 1 cup | Activates yeast | Warm milk |
| Active dry yeast | 2¼ teaspoons (1 packet) | Helps dough rise | Instant yeast |
| Granulated sugar | 2 tablespoons | Feeds yeast and adds flavor | Honey |
| Salt | 1 teaspoon | Balances flavor | Fine sea salt |
| Unsalted butter, softened | 2 tablespoons | Soft texture | Olive oil |
| Egg | 1 large | Richness and structure | Omit for vegan version (slightly denser loaf) |
Equipment Needed
- 8½ x 4½-inch loaf pan
- Large mixing bowl
- Measuring cups
- Measuring spoons
- Wooden spoon
- Dough scraper (optional)
- Kitchen towel
- Cooling rack
- Pastry brush (optional)
How to Make Small-Batch Bread Recipe for One Loaf Pan Size
Step 1: Activate the Yeast
Pour the warm water into a large mixing bowl. Stir in the sugar, then sprinkle the yeast over the surface. Let it sit for 5–10 minutes until it becomes foamy. This step confirms that the yeast is active.
Step 2: Mix the Wet Ingredients
Add the softened butter and egg to the yeast mixture. Stir until well combined.
Step 3: Add the Dry Ingredients
Gradually add the flour and salt while stirring with a wooden spoon. Continue mixing until a shaggy dough forms.
Step 4: Knead the Dough
Transfer the dough to a lightly floured surface. Knead for 8–10 minutes until it becomes smooth, elastic, and slightly tacky but not sticky. If needed, add a little more flour, one tablespoon at a time.
Step 5: First Rise
Place the dough into a lightly greased bowl. Cover it with a clean kitchen towel or plastic wrap. Let it rise in a warm place for about 1 hour or until doubled in size.
Step 6: Shape the Dough
Punch down the risen dough to release excess air. Shape it into a tight loaf by gently rolling and tucking the edges underneath.
Step 7: Place in the Loaf Pan
Grease your loaf pan lightly with butter or non-stick spray. Place the shaped dough seam-side down into the pan.
Step 8: Second Rise
Cover the loaf loosely with a towel and allow it to rise again for 30–40 minutes. The dough should rise about one inch above the rim of the pan.
Step 9: Bake
Preheat your oven to 375°F (190°C). Bake the bread for 28–30 minutes, or until the top is golden brown and the loaf sounds hollow when tapped.
Step 10: Cool Completely
Remove the loaf from the pan immediately and place it on a cooling rack. Let it cool for at least one hour before slicing. Cooling allows the crumb to set properly and makes slicing much easier.
This small-batch bread recipe for one loaf pan size creates a soft, tender loaf with a beautiful golden crust, making it perfect for sandwiches, toast, or serving alongside soups and salads.
Expert Tips for Best Results
Making the perfect small-batch bread recipe for one loaf pan size is easy when you follow a few simple baking tips. These suggestions will help you achieve a soft crumb, a golden crust, and consistent results every time.
1. Measure Flour Correctly
Spoon the flour into your measuring cup and level it with a knife. Avoid scooping directly from the bag, as this packs in too much flour and can make the bread dense.
2. Check the Water Temperature
Warm water should be between 105°F and 110°F (40°C–43°C). Water that’s too hot can kill the yeast, while water that’s too cool may prevent it from activating.
3. Knead Until Smooth
Proper kneading develops gluten, giving your loaf a soft and elastic texture. The dough should feel smooth and spring back when lightly pressed.
4. Let the Dough Rise Fully
Don’t rush the rising time. A full rise gives your small-batch bread recipe for one loaf pan size a light, airy crumb.
5. Avoid Adding Too Much Flour
The dough should be slightly tacky but not sticky. Adding too much flour can result in a dry loaf.
6. Preheat the Oven
Always bake in a fully preheated oven to ensure even baking and a beautifully browned crust.
7. Brush with Butter
For an extra-soft crust, brush the hot loaf with melted butter immediately after baking.
8. Cool Before Slicing
Although it’s tempting to cut into fresh bread, let it cool completely. This allows the crumb to set and prevents gummy slices.
Common Mistakes to Avoid
Using Expired Yeast
Old yeast may not rise properly. Always check the expiration date before baking.
Adding Hot Water
Water that’s too hot can destroy the yeast, preventing the dough from rising.
Over-Flouring the Dough
Too much flour creates a heavy, dry loaf instead of a soft and fluffy one.
Skipping the Second Rise
The second rise helps the loaf develop its final shape and texture. Don’t skip this important step.
Baking Too Long
Overbaking can make the crust too hard and dry out the bread. Check for doneness after 28 minutes.
Cutting the Bread Too Soon
Warm bread continues to set after baking. Slicing too early can compress the crumb.
Using the Wrong Pan Size
This small-batch bread recipe for one loaf pan size is designed for an 8½ x 4½-inch loaf pan. A larger pan may produce a flatter loaf.
Recipe Variations
Healthy Version
- Replace half of the all-purpose flour with whole wheat flour.
- Use olive oil instead of butter.
- Add chia seeds, flaxseeds, or oats for extra nutrition.
Gluten-Free Version
Use a quality gluten-free bread flour blend that contains xanthan gum. Follow the package instructions for yeast breads.
Dairy-Free Version
Replace butter with olive oil or vegan butter. Use warm water instead of milk if you choose to enrich the dough.
Family-Friendly Version
Mix in shredded cheddar cheese, garlic powder, or dried Italian herbs for a flavorful loaf the whole family will enjoy.
Storage Instructions
Room Temperature
Store the cooled loaf in a bread bag or airtight container for up to 3 days.
Refrigerator Storage
Although refrigeration can dry out homemade bread, it can be stored in an airtight container for up to 1 week if necessary.
Freezer Storage
Slice the loaf before freezing. Wrap slices tightly in plastic wrap and place them in a freezer-safe bag. Freeze for up to 3 months.
Reheating Instructions
Toaster
Toast individual slices until lightly golden.
Oven
Wrap the loaf in aluminum foil and warm it in a 325°F (163°C) oven for about 10 minutes.
Microwave
Heat slices for 10–15 seconds. Avoid overheating, as this can make the bread chewy.
What to Serve With Small-Batch Bread Recipe for One Loaf Pan Size
This homemade bread pairs wonderfully with many meals and spreads.
- Butter and jam
- Peanut butter
- Honey
- Avocado toast
- Scrambled eggs
- Tomato soup
- Chicken noodle soup
- Beef stew
- Grilled cheese sandwiches
- Tuna salad
- Chicken salad
- Garlic butter
Nutritional Information
| Nutrient | Amount Per Slice |
|---|---|
| Calories | 170 |
| Protein | 5g |
| Carbohydrates | 30g |
| Fat | 3g |
| Saturated Fat | 1.5g |
| Fiber | 1g |
| Sugar | 2g |
| Sodium | 220mg |
| Potassium | 60mg |
Nutrition values are estimates and may vary depending on the ingredients used.
Read More About:15-Minute Chicken Recipes for One Person
Frequently Asked Questions
1. Can I make this recipe ahead of time?
Yes. You can prepare the dough the night before and let it rise slowly in the refrigerator.
2. Can I freeze the bread?
Absolutely. This small-batch bread recipe for one loaf pan size freezes beautifully for up to three months.
3. Why didn’t my bread rise?
Inactive yeast, cold temperatures, or water that was too hot can all prevent the dough from rising.
4. Can I use bread flour?
Yes. Bread flour creates a slightly chewier texture and a taller loaf.
5. How do I know when the bread is fully baked?
The loaf should be golden brown and sound hollow when tapped on the bottom. An internal temperature of 190°F–200°F (88°C–93°C) indicates it’s fully baked.
6. Can I make this recipe without eggs?
Yes. The bread will still bake well, although the texture may be slightly less rich.
7. Can I use instant yeast?
Yes. Instant yeast can be mixed directly with the dry ingredients without proofing first.
8. How long does homemade bread stay fresh?
This small-batch bread recipe for one loaf pan size stays freshest for about three days at room temperature.
9. Can I add seeds or nuts?
Yes. Sunflower seeds, sesame seeds, pumpkin seeds, or chopped walnuts are excellent additions.
10. Why is this small-batch bread recipe for one loaf pan size so popular?
Because it produces just one perfectly sized loaf, minimizes waste, uses simple pantry ingredients, and is easy enough for beginners while delivering bakery-quality results.
Related Recipes
- Easy Homemade Sandwich Bread
- Honey Wheat Bread
- Soft Dinner Rolls
- No-Knead Artisan Bread
- Cinnamon Swirl Bread
Final Thoughts
If you’ve been looking for a reliable small-batch bread recipe for one loaf pan size, this recipe is one you’ll come back to again and again. It combines simple ingredients, easy techniques, and dependable results to create a loaf that’s soft on the inside, golden on the outside, and perfect for everyday meals.
Whether you’re baking your first loaf or simply want a smaller batch that fits your household, this recipe delivers fresh homemade bread without unnecessary leftovers. Enjoy it toasted for breakfast, layered into sandwiches for lunch, or served warm with soup at dinner. Once you taste this small-batch bread recipe for one loaf pan size, you’ll discover just how rewarding homemade bread can be.
Recipe Card (HTML)
<!DOCTYPE html>
<html lang="en">
<head>
<meta charset="UTF-8">
<title>Small-Batch Bread Recipe for One Loaf Pan Size</title>

<style>
body{
font-family:Arial,sans-serif;
background:#f7f3ee;
padding:30px;
}

.recipe-card{
max-width:760px;
margin:auto;
background:#ffffff;
border-radius:15px;
padding:25px;
box-shadow:0 6px 18px rgba(0,0,0,.15);
}

.recipe-title{
text-align:center;
color:#8B5E3C;
margin-bottom:20px;
}

.info-grid{
display:grid;
grid-template-columns:repeat(auto-fit,minmax(120px,1fr));
gap:10px;
margin-bottom:25px;
}

.info-box{
background:#f8efe4;
padding:12px;
border-radius:8px;
text-align:center;
font-weight:bold;
}

h3{
color:#444;
margin-top:20px;
}

ul,ol{
line-height:1.8;
}

.notes{
margin-top:20px;
padding:15px;
background:#fff8dc;
border-left:5px solid #d4a017;
border-radius:6px;
}
</style>
</head>

<body>

<div class="recipe-card">

<h2 class="recipe-title">🍞 Small-Batch Bread Recipe for One Loaf Pan Size</h2>

<div class="info-grid">
<div class="info-box">Prep<br>20 mins</div>
<div class="info-box">Rise<br>1 hr 30 mins</div>
<div class="info-box">Bake<br>30 mins</div>
<div class="info-box">Servings<br>10 slices</div>
<div class="info-box">Calories<br>170</div>
</div>

<h3>Ingredients</h3>

<ul>
<li>3 cups all-purpose flour</li>
<li>1 cup warm water</li>
<li>2¼ tsp active dry yeast</li>
<li>2 tbsp sugar</li>
<li>1 tsp salt</li>
<li>2 tbsp softened butter</li>
<li>1 large egg</li>
</ul>

<h3>Instructions</h3>

<ol>
<li>Activate the yeast in warm water with sugar.</li>
<li>Mix in butter, egg, flour, and salt.</li>
<li>Knead until smooth and elastic.</li>
<li>Let the dough rise until doubled.</li>
<li>Shape into a loaf and place in a greased loaf pan.</li>
<li>Allow the dough to rise again.</li>
<li>Bake at 375°F (190°C) for 28–30 minutes.</li>
<li>Brush with butter if desired.</li>
<li>Cool completely before slicing.</li>
</ol>

<div class="notes">
<strong>Notes:</strong><br>
Use fresh yeast for the best rise. Store at room temperature for up to 3 days or freeze sliced bread for up to 3 months. For an extra-soft crust, brush the loaf with melted butter immediately after baking.
</div>

</div>

</body>
</html>