Make delicious mini no bake desserts for celebrations with this easy recipe. Perfect for birthdays, holidays, baby showers, and family parties.
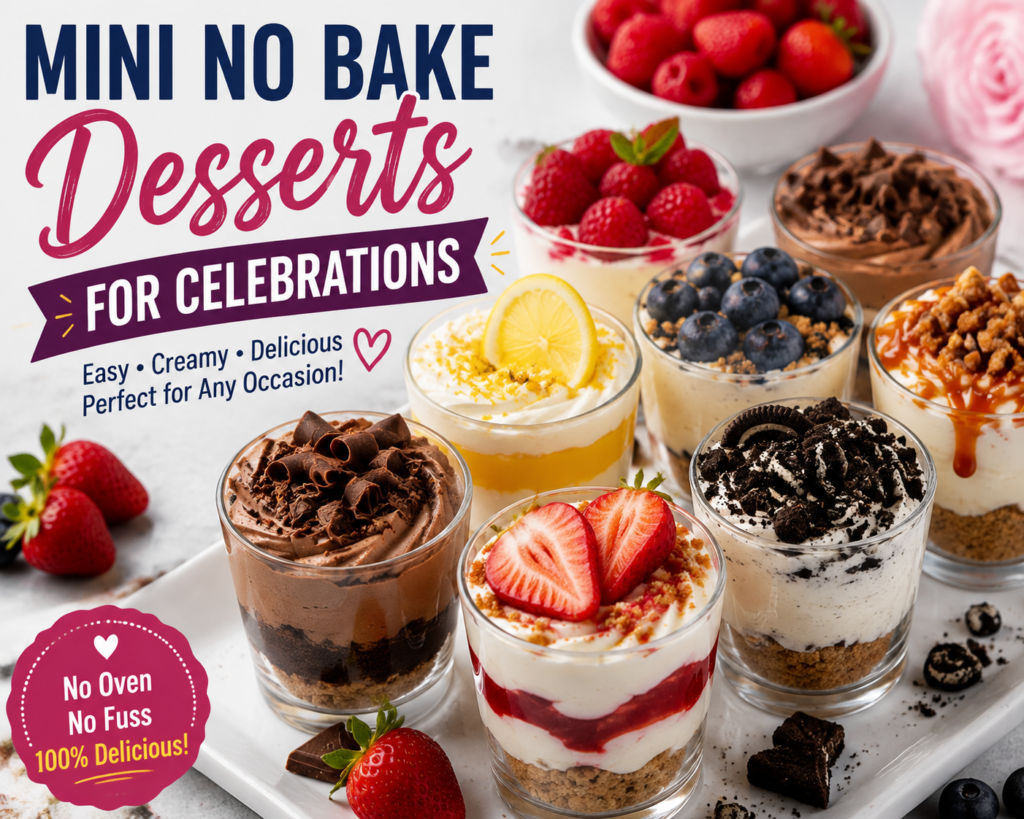
Mini No Bake Desserts for Celebrations
If you’re looking for an easy, elegant, and crowd-pleasing dessert, these mini no bake desserts for celebrations are the perfect choice. They combine a crunchy cookie base, a smooth cream cheese filling, and fresh fruit or chocolate toppings into adorable individual servings that everyone will love. Best of all, they require no oven, making them ideal for warm weather, busy schedules, or last-minute party planning.
People love mini no bake desserts for celebrations because they are simple to prepare, easy to customize, and look beautiful on dessert tables. Whether you’re hosting a birthday party, baby shower, bridal shower, anniversary, holiday gathering, or family reunion, these bite-sized desserts are guaranteed to impress your guests. Their individual portions also make serving quick and mess-free.
What makes this version special is its creamy texture, balanced sweetness, and endless topping possibilities. You can decorate each dessert differently using berries, chocolate, caramel, cookies, or nuts to match any celebration theme. Even beginners can make these delicious treats with confidence, making this recipe a favorite for every home baker.
Recipe Overview
| Details | Information |
|---|---|
| Prep Time | 30 minutes |
| Cook Time | 0 minutes |
| Chill Time | 3 hours |
| Total Time | 3 hours 30 minutes |
| Servings | 12 mini desserts |
| Calories | Approximately 240 per serving |
| Difficulty Level | Easy |
Why You’ll Love This Recipe
- No baking required, making it perfect for beginners.
- Ready with simple pantry ingredients.
- Beautiful individual servings for parties.
- Easy to customize with your favorite toppings.
- Can be prepared a day ahead.
- Great for birthdays, weddings, baby showers, and holidays.
- Rich, creamy, and refreshing without being overly sweet.
Ingredients
Cookie Crust
| Ingredient | Quantity | Purpose | Substitute |
|---|---|---|---|
| Graham cracker crumbs | 2 cups | Crunchy base | Digestive biscuits or vanilla wafers |
| Melted butter | ½ cup | Holds crust together | Coconut oil |
| Granulated sugar | 2 tbsp | Adds sweetness | Brown sugar |
Cream Cheese Filling
| Ingredient | Quantity | Purpose | Substitute |
|---|---|---|---|
| Cream cheese | 16 oz | Main filling | Mascarpone cheese |
| Heavy whipping cream | 1½ cups | Creates light texture | Coconut cream |
| Powdered sugar | ¾ cup | Sweetens filling | Fine caster sugar |
| Vanilla extract | 2 tsp | Adds flavor | Vanilla bean paste |
| Lemon juice | 1 tbsp | Balances sweetness | Lime juice |
Toppings
| Ingredient | Quantity | Purpose | Substitute |
|---|---|---|---|
| Fresh strawberries | 1 cup | Fresh topping | Mixed berries |
| Blueberries | ½ cup | Color and flavor | Blackberries |
| Chocolate shavings | ½ cup | Decoration | Cocoa powder |
| Crushed Oreos | ½ cup | Crunch | Chocolate cookies |
| Caramel sauce | ¼ cup | Sweet drizzle | Chocolate sauce |
| Fresh mint leaves | As needed | Garnish | Lemon zest |
Equipment Needed
- Mixing bowls
- Electric hand mixer
- Measuring cups
- Measuring spoons
- Rubber spatula
- Mini dessert cups or small jars
- Food processor
- Piping bag (optional)
- Spoon
- Refrigerator
How to Make Mini No Bake Desserts for Celebrations
Step 1
Crush the graham crackers into fine crumbs using a food processor or place them in a zip-top bag and crush them with a rolling pin until smooth.
Step 2
Mix the graham cracker crumbs, melted butter, and sugar in a bowl until the mixture resembles wet sand.
Step 3
Divide the crust mixture evenly among the mini dessert cups. Press firmly with the back of a spoon to create a compact base.
Step 4
Place the dessert cups in the refrigerator while preparing the filling. Chilling helps the crust become firm.
Step 5
In a large mixing bowl, beat the softened cream cheese until smooth and free of lumps.
Step 6
Add powdered sugar, vanilla extract, and lemon juice. Continue mixing until the ingredients are fully combined and creamy.
Step 7
In a separate chilled bowl, whip the heavy cream until stiff peaks form.
Step 8
Gently fold the whipped cream into the cream cheese mixture using a rubber spatula. Fold slowly to keep the filling light and airy.
Step 9
Transfer the filling into a piping bag or use a spoon to fill each dessert cup evenly.
Step 10
Smooth the tops with a spoon or offset spatula for a neat appearance.
Step 11
Decorate each dessert with your favorite toppings. Add sliced strawberries, blueberries, chocolate shavings, crushed cookies, caramel drizzle, or fresh mint leaves for a colorful finish.
Step 12
Refrigerate the desserts for at least three hours, or overnight, to allow them to set completely. Serve chilled and enjoy these delicious mini no bake desserts for celebrations at your next special event.
Expert Tips for Best Results
Making perfect mini no bake desserts for celebrations is easy, but these expert tips will help you achieve bakery-style results every time.
- Use room-temperature cream cheese. Softened cream cheese blends smoothly and prevents lumps in the filling.
- Chill the mixing bowl. A cold bowl helps the whipping cream whip faster and hold stiff peaks.
- Press the crust firmly. A compact crust keeps the dessert layers stable when serving.
- Don’t overmix the whipped cream. Stop mixing as soon as stiff peaks form to maintain a light, fluffy texture.
- Refrigerate long enough. Chill the desserts for at least three hours, or overnight for the best texture.
- Decorate just before serving. Fresh fruit and crunchy toppings stay fresher and more attractive.
- Use quality vanilla extract. Pure vanilla provides a richer flavor than imitation vanilla.
- Pipe the filling. A piping bag creates neat, professional-looking layers.
- Mix and match toppings. Offer a variety of toppings so guests can enjoy different flavors.
- Serve chilled. These desserts taste best straight from the refrigerator.
Common Mistakes to Avoid
Avoid these common mistakes when making mini no bake desserts for celebrations.
- Using cold cream cheese: It creates a lumpy filling.
- Skipping the chilling time: The filling may not set properly.
- Adding too much butter: The crust can become greasy.
- Overwhipping the cream: It may turn grainy or separate.
- Using watery fruit: Pat fresh fruit dry to avoid excess moisture.
- Overfilling the dessert cups: Leave room for toppings and garnish.
- Using stale cookies: Fresh cookie crumbs provide the best flavor and texture.
- Preparing too far in advance with fruit toppings: Add fresh fruit shortly before serving for the best appearance.
Recipe Variations
These mini no bake desserts for celebrations are easy to customize for different dietary needs and occasions.
Healthy Version
- Replace cream cheese with Greek yogurt.
- Use honey or maple syrup instead of powdered sugar.
- Choose whole-grain cookies for the crust.
- Top with fresh berries and chopped nuts.
Gluten-Free Version
- Use certified gluten-free cookies or crackers.
- Check all ingredients for gluten-free certification.
- Decorate with naturally gluten-free fruits.
Dairy-Free Version
- Replace cream cheese with dairy-free cream cheese.
- Use coconut cream instead of heavy whipping cream.
- Choose dairy-free cookies for the crust.
- Garnish with dairy-free chocolate.
Family-Friendly Version
- Add colorful sprinkles.
- Use mini chocolate chips.
- Top with crushed candies or marshmallows.
- Let children decorate their own dessert cups.
Storage Instructions
Proper storage helps keep your mini no bake desserts for celebrations fresh and delicious.
Room Temperature
Because they contain dairy, do not leave them at room temperature for more than 2 hours.
Refrigerator Storage
Cover the dessert cups with plastic wrap or airtight lids. Store in the refrigerator for up to 4 days.
Freezer Storage
Freeze without fresh fruit toppings for up to 2 months. Wrap tightly to prevent freezer burn. Thaw overnight in the refrigerator before serving.
Reheating Instructions
Since these are mini no bake desserts for celebrations, reheating is not recommended.
- Remove refrigerated desserts about 10 minutes before serving for the creamiest texture.
- Thaw frozen desserts overnight in the refrigerator.
- Avoid microwaving because the filling may melt and lose its texture.
What to Serve With Mini No Bake Desserts for Celebrations
Pair these desserts with refreshing drinks and complementary treats.
- Fresh fruit platter
- Chocolate-covered strawberries
- Vanilla ice cream
- Fresh lemonade
- Sparkling fruit punch
- Coffee or espresso
- Hot tea
- Iced coffee
- Mini cookies
- Chocolate truffles
Nutritional Information
| Nutrient | Amount Per Serving |
|---|---|
| Calories | 240 kcal |
| Carbohydrates | 22 g |
| Protein | 4 g |
| Fat | 15 g |
| Saturated Fat | 9 g |
| Cholesterol | 45 mg |
| Sodium | 170 mg |
| Fiber | 1 g |
| Sugar | 15 g |
| Calcium | 8% DV |
| Vitamin C | 6% DV |
Note: Nutrition values are estimates and may vary depending on the ingredients and toppings used.
Read More About:Homemade Desserts Recipe with Fresh Berries | Easy & Fresh
Frequently Asked Questions
1. Can I make mini no bake desserts for celebrations ahead of time?
Yes. They can be prepared one day in advance and stored in the refrigerator until serving.
2. Can I freeze them?
Yes. Freeze the desserts without fresh fruit toppings for up to two months.
3. How long do they last?
They stay fresh in the refrigerator for up to four days when stored in an airtight container.
4. Can I use frozen fruit?
Yes, but thaw and drain it well before using to prevent excess moisture.
5. What are the best toppings?
Fresh berries, chocolate shavings, caramel sauce, crushed cookies, chopped nuts, and whipped cream are all excellent choices.
6. Can I make them without cream cheese?
Yes. You can substitute mascarpone, Greek yogurt, or dairy-free cream cheese.
7. Are these desserts suitable for parties?
Absolutely. Their individual servings make them ideal for birthdays, weddings, baby showers, anniversaries, and holiday celebrations.
8. Can children help make this recipe?
Yes. Since there is no baking involved, children can safely help crush cookies, mix ingredients, and decorate the dessert cups with supervision.
9. Can I make different flavors?
Yes. Add cocoa powder, peanut butter, coffee extract, lemon zest, or fruit puree to create unique flavor variations.
10. What size dessert cups should I use?
Mini dessert cups between 4 and 6 ounces work best for individual servings.
Related Recipes
- Mini No-Bake Cheesecake Cups
- Strawberry Shortcake Dessert Cups
- Chocolate Mousse Cups
- No-Bake Oreo Cheesecake Bites
- Lemon Berry Parfait Cups
Final Thoughts
These mini no bake desserts for celebrations are the perfect combination of convenience, elegance, and irresistible flavor. With a buttery cookie crust, creamy filling, and endless topping possibilities, they make a beautiful addition to birthdays, baby showers, bridal showers, holiday parties, anniversaries, and family gatherings.
Because they require no baking, they’re an excellent choice for beginner cooks and experienced bakers alike. You can prepare them ahead of time, customize the flavors to match your event, and decorate them in countless creative ways. Once you try these mini no bake desserts for celebrations, they’ll quickly become one of your favorite go-to party desserts.
Recipe Card (HTML)
<!DOCTYPE html>
<html lang="en">
<head>
<meta charset="UTF-8">
<meta name="viewport" content="width=device-width, initial-scale=1.0">
<title>Mini No Bake Desserts for Celebrations</title>

<style>
body{
font-family:Arial,sans-serif;
background:#f8f8f8;
padding:30px;
}

.recipe-card{
max-width:850px;
margin:auto;
background:#fff;
border-radius:15px;
box-shadow:0 5px 20px rgba(0,0,0,.12);
padding:30px;
}

.recipe-title{
text-align:center;
color:#d63384;
font-size:34px;
margin-bottom:20px;
}

.info{
display:grid;
grid-template-columns:repeat(3,1fr);
gap:15px;
margin-bottom:25px;
}

.box{
background:#ffeef5;
padding:15px;
border-radius:10px;
text-align:center;
font-weight:bold;
}

h2{
color:#444;
margin-top:25px;
}

ul,ol{
line-height:1.8;
}

.notes{
background:#fff8dc;
padding:15px;
border-radius:10px;
margin-top:25px;
}
</style>
</head>

<body>

<div class="recipe-card">

<div class="recipe-title">🍓 Mini No Bake Desserts for Celebrations</div>

<div class="info">
<div class="box">Prep Time<br>30 Minutes</div>
<div class="box">Cook Time<br>0 Minutes</div>
<div class="box">Total Time<br>3 Hours 30 Minutes</div>
<div class="box">Servings<br>12</div>
<div class="box">Calories<br>240</div>
<div class="box">Difficulty<br>Easy</div>
</div>

<h2>Ingredients</h2>

<ul>
<li>2 cups graham cracker crumbs</li>
<li>½ cup melted butter</li>
<li>2 tbsp sugar</li>
<li>16 oz cream cheese</li>
<li>1½ cups heavy whipping cream</li>
<li>¾ cup powdered sugar</li>
<li>2 tsp vanilla extract</li>
<li>1 tbsp lemon juice</li>
<li>Fresh berries</li>
<li>Chocolate shavings</li>
<li>Caramel sauce</li>
<li>Mint leaves</li>
</ul>

<h2>Instructions</h2>

<ol>
<li>Prepare the cookie crust and press into dessert cups.</li>
<li>Chill the crust.</li>
<li>Beat cream cheese, sugar, vanilla, and lemon juice.</li>
<li>Whip heavy cream until stiff peaks form.</li>
<li>Fold whipped cream into the cream cheese mixture.</li>
<li>Pipe the filling into dessert cups.</li>
<li>Add your favorite toppings.</li>
<li>Chill for at least 3 hours before serving.</li>
</ol>

<div class="notes">
<h2>Notes</h2>
<p>✔ Chill overnight for the best texture.</p>
<p>✔ Decorate with fresh fruit just before serving.</p>
<p>✔ Store refrigerated for up to 4 days.</p>
</div>

</div>

</body>
</html>