Discover the best gluten-free bread recipe that doesn’t crumble. Soft, fluffy, easy to make, and perfect for sandwiches, toast, and everyday baking.
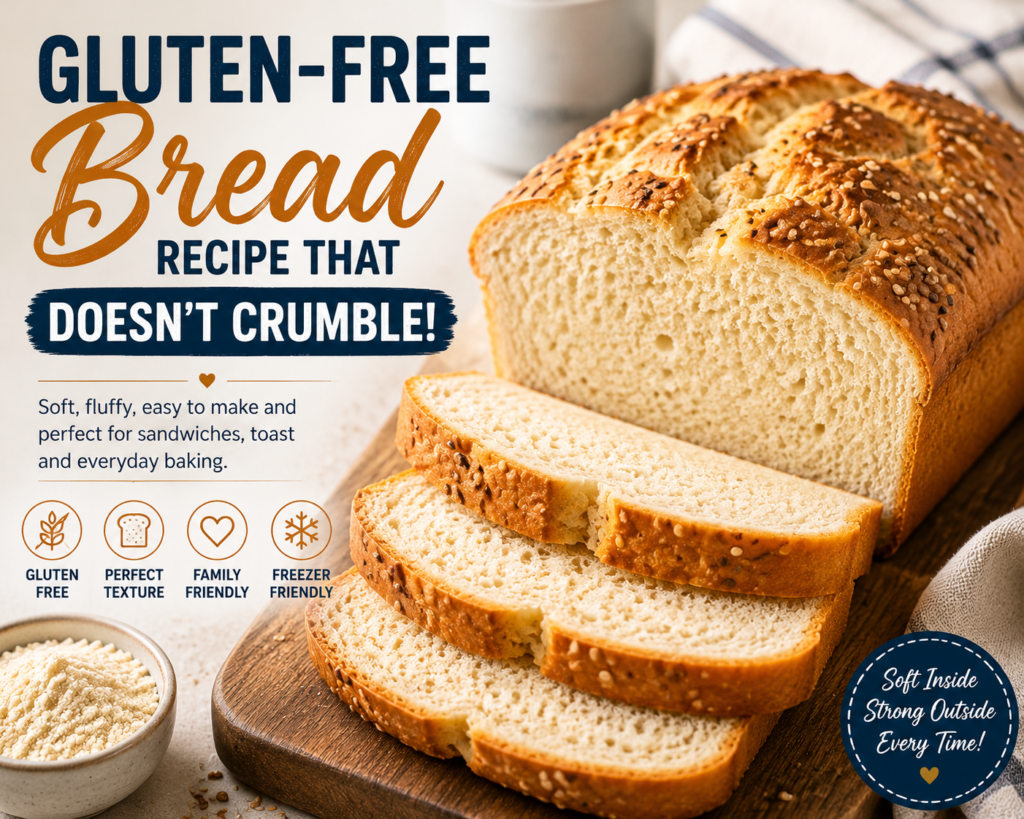
Gluten-Free Bread Recipe That Doesn’t Crumble
Finding a gluten-free bread recipe that doesn’t crumble can feel like searching for a needle in a haystack. Many homemade gluten-free loaves look beautiful when they come out of the oven, only to fall apart when sliced. Dry texture, crumbly slices, and bread that won’t hold together are common frustrations for anyone following a gluten-free lifestyle.
The good news is that this gluten-free bread recipe that doesn’t crumble solves those problems. It creates a soft, moist loaf with a tender crumb that’s sturdy enough for sandwiches, toast, and even French toast. The secret lies in using the right combination of gluten-free flour, binders like psyllium husk and xanthan gum, and proper hydration.
Whether you have coeliac disease, gluten intolerance, or simply enjoy gluten-free baking, this recipe delivers bakery-quality results at home. It’s ideal for breakfast, lunch, or dinner and freezes beautifully for meal prep. Best of all, you don’t need advanced baking skills—just follow the simple steps below and you’ll enjoy fresh homemade bread that tastes amazing and stays together with every slice.
Recipe Overview
| Recipe Detail | Information |
|---|---|
| Prep Time | 20 minutes |
| Cook Time | 50 minutes |
| Rising Time | 45 minutes |
| Total Time | 1 hour 55 minutes |
| Servings | 12 slices |
| Calories | Approximately 185 per slice |
| Difficulty Level | Easy to Moderate |
Why You’ll Love This Recipe
There are countless reasons to try this gluten-free bread recipe that doesn’t crumble, especially if you’ve struggled with disappointing gluten-free loaves in the past.
- Soft, fluffy texture that stays fresh for days.
- Holds together perfectly for sandwiches.
- Doesn’t fall apart while slicing.
- Easy enough for beginner bakers.
- Freezes exceptionally well for future meals.
- Uses readily available pantry ingredients.
- Delicious toasted or fresh from the oven.
Ingredients
The quality of your ingredients plays a huge role in creating a gluten-free bread recipe that doesn’t crumble.
| Ingredient | Quantity | Purpose | Possible Substitution |
|---|---|---|---|
| Gluten-free bread flour blend | 500g | Main flour base | Homemade gluten-free flour mix |
| Psyllium husk powder | 20g | Adds elasticity and structure | Whole psyllium husk (slightly increase quantity) |
| Xanthan gum | 2 teaspoons | Mimics gluten binding | Guar gum |
| Instant yeast | 10g | Helps bread rise | Active dry yeast (activate first) |
| Sugar or honey | 2 tablespoons | Feeds yeast and adds flavour | Maple syrup |
| Salt | 2 teaspoons | Enhances flavour | Fine sea salt |
| Warm water | 450ml | Hydrates dough | Warm milk for richer bread |
| Eggs | 2 large | Adds moisture and structure | Flax eggs for vegan option |
| Olive oil | 3 tablespoons | Keeps bread soft | Avocado oil or melted butter |
| Apple cider vinegar | 1 tablespoon | Improves rise and texture | Lemon juice |
Why Psyllium Husk Is Essential
One of the biggest secrets behind a gluten-free bread recipe that doesn’t crumble is psyllium husk. When mixed with water, it forms a gel that behaves similarly to gluten, giving the dough flexibility and helping the finished loaf stay soft instead of breaking apart.
Choosing the Right Gluten-Free Flour
Not all gluten-free flour blends perform the same. Look for a blend that includes ingredients such as:
- Rice flour
- Potato starch
- Tapioca starch
- Corn starch
- Sorghum flour
- Millet flour
Avoid single-flour recipes, as they often produce dense or crumbly bread.
Equipment Needed
You don’t need professional equipment to make this recipe.
Gather these kitchen essentials:
- Large mixing bowl
- Measuring cups and spoons
- Digital kitchen scale
- Whisk
- Stand mixer with dough hook (recommended)
- Silicone spatula
- 9×5-inch loaf tin
- Parchment paper
- Kitchen towel
- Cooling rack
- Sharp bread knife
How to Make Gluten-Free Bread Recipe That Doesn’t Crumble
Step 1: Activate the Yeast
Combine the warm water, sugar, and yeast in a bowl. Stir gently and let the mixture sit for 5–10 minutes until it becomes foamy. This indicates the yeast is active and ready to help your bread rise.
Step 2: Mix the Dry Ingredients
In a separate large bowl, whisk together:
- Gluten-free flour blend
- Psyllium husk powder
- Xanthan gum
- Salt
Mix thoroughly so every ingredient is evenly distributed.
Step 3: Combine the Wet Ingredients
In another bowl, whisk together:
- Eggs
- Olive oil
- Apple cider vinegar
Pour in the activated yeast mixture and stir until well combined.
Step 4: Form the Dough
Gradually add the wet ingredients to the dry ingredients while mixing continuously. A stand mixer fitted with a dough hook works best, but a sturdy spoon can also be used.
The dough will be much wetter than traditional wheat dough. This is completely normal and is one reason this gluten-free bread recipe that doesn’t crumble remains soft after baking.
Mix for about 6–8 minutes until the dough becomes smooth and slightly elastic.
Step 5: Let the Psyllium Work
Allow the dough to rest for 10 minutes before shaping. During this time, the psyllium husk absorbs moisture and creates a gel-like structure that strengthens the dough.
You’ll notice the dough becomes firmer and easier to handle.
Step 6: Shape the Loaf
Lightly grease your loaf tin and line it with parchment paper.
Transfer the dough into the tin and smooth the surface using a damp spatula or wet hands.
A smooth top encourages an even rise and attractive finished loaf.
Step 7: Proof the Dough
Cover the loaf tin with a clean kitchen towel and place it in a warm, draught-free location.
Allow it to rise for approximately 40–45 minutes, or until the dough has expanded by about 50%.
Avoid over-proofing, as gluten-free dough can collapse if left too long.
Step 8: Bake to Perfection
Preheat your oven to 190°C (375°F).
Bake the loaf for 45–50 minutes until:
- The top is golden brown.
- The loaf sounds hollow when tapped.
- The internal temperature reaches about 95°C (203°F) if checked with a thermometer.
If the top browns too quickly, loosely cover it with foil for the final 15 minutes of baking.
Step 9: Cool Completely
Remove the bread from the tin immediately and place it on a wire rack.
Allow it to cool for at least 1–2 hours before slicing.
This step is crucial. Cutting into the loaf too soon can make even a well-made gluten-free bread recipe that doesn’t crumble seem gummy or fragile because the crumb is still setting.
Here’s Part 2 of your recipe article.
Expert Tips for Best Results
Making a gluten-free bread recipe that doesn’t crumble is easier when you follow a few professional baking techniques. These tips can make the difference between an average loaf and one that’s soft, fluffy, and bakery-quality.
1. Measure Ingredients by Weight
Using a digital kitchen scale ensures accuracy. Gluten-free flours vary in density, and even a small measurement error can affect the texture of your bread.
2. Don’t Skip the Psyllium Husk
Psyllium husk is one of the most important ingredients in a gluten-free bread recipe that doesn’t crumble. It creates elasticity and helps the bread hold together after baking.
3. Use Warm—Not Hot—Water
Water should be warm to the touch, around 38–43°C (100–110°F). Water that’s too hot can kill the yeast, while cold water slows down fermentation.
4. Mix the Dough Thoroughly
Unlike traditional wheat bread, gluten-free dough benefits from longer mixing. This allows the psyllium and xanthan gum to hydrate fully, resulting in a smoother loaf.
5. Allow the Bread to Cool Completely
Patience is key. Cooling for at least one hour allows the crumb to set properly, preventing the loaf from becoming gummy or falling apart.
6. Store the Bread Properly
Once cooled, wrap the bread tightly to prevent moisture loss. Proper storage helps maintain the soft texture for several days.
7. Toast Leftover Slices
Even after a few days, this gluten-free bread recipe that doesn’t crumble tastes wonderful when lightly toasted. Toasting also refreshes the texture.
Common Mistakes to Avoid
Avoid these common baking mistakes to achieve the perfect loaf every time.
Using Too Much Flour
Adding extra flour because the dough seems sticky is a common mistake. Gluten-free dough should be wetter than wheat dough.
Cutting the Bread Too Soon
Fresh bread continues cooking internally after leaving the oven. Cutting too early can make it appear undercooked.
Skipping the Binding Ingredients
Without psyllium husk or xanthan gum, your loaf may become dry and crumbly.
Over-Proofing the Dough
Unlike wheat dough, gluten-free dough doesn’t benefit from excessive rising. Once it has increased by about 50%, it’s ready for baking.
Incorrect Oven Temperature
Always preheat the oven fully before baking. An inconsistent temperature can affect the rise and crumb structure.
Using an Old Yeast Packet
Always check the expiry date on your yeast. Fresh yeast produces a better rise and lighter texture.
Not Lining the Loaf Pan
Parchment paper makes it much easier to remove the loaf without damaging its shape.
Recipe Variations
One of the best things about this gluten-free bread recipe that doesn’t crumble is how easy it is to customise.
Healthy Version
For a more nutritious loaf:
- Add chia seeds.
- Mix in flaxseed meal.
- Include sunflower seeds.
- Replace part of the flour with oat flour (certified gluten-free).
- Reduce the sugar slightly.
Dairy-Free Version
This recipe is naturally dairy-free if made with olive oil and water. If using milk, substitute with:
- Almond milk
- Oat milk
- Soy milk
- Coconut milk
Vegan Version
Replace the eggs with:
- Two flax eggs
- Two chia eggs
- Commercial egg replacer
The texture will remain soft while staying completely plant-based.
Family-Friendly Version
Children often enjoy mild flavours. Consider adding:
- Mild cheddar-style dairy-free cheese
- Mixed herbs
- Garlic powder
- Sesame seeds on top
- A sprinkle of oats before baking
Storage Instructions
Proper storage helps preserve freshness and prevents your gluten-free bread recipe that doesn’t crumble from drying out.
Room Temperature
Store in an airtight container or bread bag.
Best consumed within:
- 2–3 days
Keep away from direct sunlight and heat.
Refrigerator Storage
Refrigeration extends freshness.
Storage time:
- Up to 6 days
Wrap tightly before refrigerating to avoid drying out.
Freezer Storage
This bread freezes exceptionally well.
For best results:
- Slice before freezing.
- Place parchment paper between slices.
- Store in a freezer-safe bag.
- Remove as much air as possible.
Storage time:
- Up to 3 months
Reheating Instructions
Toaster
Toast frozen or refrigerated slices until warm and lightly crisp.
Oven
Wrap the loaf in foil.
Bake at 160°C (320°F) for 10–15 minutes.
Microwave
Heat individual slices for 15–20 seconds.
Avoid overheating, as this may make the bread chewy.
What to Serve With Gluten-Free Bread Recipe That Doesn’t Crumble
This versatile loaf pairs well with both sweet and savoury dishes.
Breakfast Ideas
- Scrambled eggs
- Avocado toast
- Peanut butter and banana
- Homemade jam
- Greek yoghurt with fruit
Lunch Pairings
- Chicken salad sandwiches
- Tuna salad
- Egg mayonnaise
- Turkey slices
- Grilled vegetables
Dinner Pairings
- Tomato soup
- Lentil soup
- Beef stew
- Chicken casserole
- Vegetable curry
Snacks
- Garlic toast
- Cheese toasties
- Bruschetta
- Hummus
- Nut butter
Nutritional Information
Approximate values per slice.
| Nutrient | Amount |
|---|---|
| Calories | 185 kcal |
| Protein | 6 g |
| Carbohydrates | 30 g |
| Fat | 5 g |
| Fibre | 5 g |
| Sugar | 2 g |
| Sodium | 290 mg |
| Calcium | 35 mg |
| Iron | 1.8 mg |
Read More About:No-Knead Bread Recipe for Beginners Overnight | Easy Homemade Bread
Frequently Asked Questions
1. Can I make this recipe ahead of time?
Yes. Bake the loaf a day in advance and store it in an airtight container once fully cooled.
2. Can I freeze this bread?
Absolutely. Slice the bread before freezing so you can remove only the slices you need.
3. Why is my gluten-free bread crumbly?
The most common reasons are insufficient psyllium husk, too little moisture, inaccurate flour measurements, or cutting the loaf before it has cooled.
4. Can I use a homemade gluten-free flour blend?
Yes. Ensure your blend contains a balance of whole-grain flours and starches for the best texture.
5. Is xanthan gum necessary?
It is highly recommended because it improves elasticity and structure. Guar gum can be used as an alternative.
6. How long does homemade gluten-free bread last?
At room temperature, it stays fresh for 2–3 days. Refrigerated, it lasts about 6 days, and frozen, up to 3 months.
7. Can I make this bread without eggs?
Yes. Replace each egg with a flax egg or chia egg for a vegan-friendly version.
8. Why is my bread dense?
Dense bread usually results from expired yeast, insufficient proofing, or using too much flour.
9. Can I bake this in a bread machine?
Yes, provided your bread machine includes a dedicated gluten-free programme.
10. What makes this gluten-free bread recipe that doesn’t crumble different?
The combination of psyllium husk, xanthan gum, proper hydration, and careful baking techniques creates a loaf that stays soft, slices cleanly, and doesn’t fall apart.
Related Recipes
If you enjoyed this gluten-free bread recipe that doesn’t crumble, you may also like:
- Soft Gluten-Free Sandwich Bread
- Gluten-Free Dinner Rolls
- Homemade Gluten-Free Bagels
- Easy Gluten-Free Banana Bread
- Gluten-Free Pizza Dough
Here’s the final part of your recipe article.
Final Thoughts
If you’ve been searching for a gluten-free bread recipe that doesn’t crumble, this recipe deserves a place in your kitchen. By combining the right gluten-free flour blend with psyllium husk, xanthan gum, and proper baking techniques, you can bake a loaf that’s soft, moist, and sturdy enough for sandwiches, toast, or your favourite toppings.
Unlike many gluten-free breads that dry out quickly or fall apart after slicing, this recipe produces consistent results with a light texture and excellent flavour. It’s beginner-friendly, freezer-friendly, and versatile enough for everyday meals or special occasions.
Don’t be discouraged if your first homemade gluten-free loaf isn’t perfect. Every oven and flour blend behaves a little differently, and small adjustments can make a big difference. Once you master this gluten-free bread recipe that doesn’t crumble, you’ll likely never want to buy store-bought gluten-free bread again.
Whether you’re baking for yourself, your family, or someone with coeliac disease or gluten sensitivity, this recipe is a reliable option that delivers delicious results every time. Happy baking!
Key Takeaways
- This gluten-free bread recipe that doesn’t crumble creates a soft, sliceable loaf with excellent structure.
- Psyllium husk and xanthan gum are the key ingredients for preventing crumbling.
- Accurate measurements and proper hydration are essential for success.
- Allow the bread to cool completely before slicing.
- The loaf freezes well and can be toasted straight from frozen.
- Suitable for sandwiches, toast, breakfast, lunch, or dinner.
- Easy to customise with seeds, herbs, or dairy-free and vegan substitutions.
- Perfect for beginners as well as experienced gluten-free bakers.
Recipe Card (HTML)
<!DOCTYPE html>
<html lang="en">
<head>
<meta charset="UTF-8">
<title>Gluten-Free Bread Recipe That Doesn't Crumble</title>

<style>
body{
font-family:Arial,Helvetica,sans-serif;
background:#f8f8f8;
padding:30px;
}

.recipe-card{
max-width:850px;
margin:auto;
background:#ffffff;
border-radius:12px;
box-shadow:0 5px 15px rgba(0,0,0,.15);
overflow:hidden;
}

.recipe-header{
background:#d4a017;
color:#fff;
padding:25px;
text-align:center;
}

.recipe-header h1{
margin:0;
font-size:34px;
}

.recipe-meta{
display:flex;
justify-content:space-around;
flex-wrap:wrap;
background:#fff8e8;
padding:18px;
font-weight:bold;
}

.section{
padding:25px;
}

.section h2{
color:#b26a00;
margin-bottom:12px;
}

ul{
padding-left:22px;
}

ol{
padding-left:22px;
line-height:1.8;
}

.notes{
background:#fff8d6;
border-left:6px solid #d4a017;
padding:15px;
margin-top:20px;
}

.footer{
background:#fafafa;
padding:18px;
text-align:center;
font-size:14px;
color:#666;
}
</style>

</head>

<body>

<div class="recipe-card">

<div class="recipe-header">
<h1>Gluten-Free Bread Recipe That Doesn't Crumble</h1>
<p>Soft • Fluffy • Perfect for Sandwiches • Beginner Friendly</p>
</div>

<div class="recipe-meta">
<div>Prep: 20 mins</div>
<div>Cook: 50 mins</div>
<div>Total: 1 hr 55 mins</div>
<div>Servings: 12</div>
<div>Calories: 185</div>
</div>

<div class="section">

<h2>Ingredients</h2>

<ul>
<li>500g gluten-free bread flour blend</li>
<li>20g psyllium husk powder</li>
<li>2 tsp xanthan gum</li>
<li>10g instant yeast</li>
<li>2 tbsp sugar or honey</li>
<li>2 tsp salt</li>
<li>450ml warm water</li>
<li>2 eggs</li>
<li>3 tbsp olive oil</li>
<li>1 tbsp apple cider vinegar</li>
</ul>

</div>

<div class="section">

<h2>Instructions</h2>

<ol>
<li>Activate the yeast with warm water and sugar.</li>

<li>Mix flour, psyllium husk, xanthan gum and salt.</li>

<li>Whisk eggs, oil and vinegar.</li>

<li>Combine wet and dry ingredients until smooth.</li>

<li>Rest the dough for 10 minutes.</li>

<li>Transfer to a prepared loaf pan.</li>

<li>Proof for about 45 minutes.</li>

<li>Bake at 190°C (375°F) for 45–50 minutes.</li>

<li>Cool completely before slicing.</li>

</ol>

</div>

<div class="section">

<h2>Notes</h2>

<div class="notes">

<ul>
<li>Always weigh ingredients for best accuracy.</li>

<li>Do not skip the psyllium husk.</li>

<li>Cool completely before cutting.</li>

<li>Freeze sliced bread for easy storage.</li>

<li>Toast leftovers for the best texture.</li>

</ul>

</div>

</div>

<div class="footer">

Fresh homemade gluten-free bread that's soft, delicious, and doesn't crumble.

</div>

</div>

</body>
</html>